How do you organize and store keywords for your PPC and SEO campaigns? Our guess is that all the magic is happening in Excel or Google Sheets. Probably, you have multiple sheets with a number of tabs where all your keywords are stored. This is a wide-spread approach (honestly, until recently, we did exactly the same), but it has its drawbacks:
- When you do a keyword research, you have to export keywords to XLS. You should do this every time you search for keywords.
- If you want to expand an existing keyword list, you have to export keywords as well. The problem is that your keyword list may already include some of the keywords you’ve exported, so you have to check for duplicates.
- The stats in your Excel keyword lists are static. To update search volume, keyword difficulty, or other metric, you should check them with a keyword research tool and restore your keyword list.
Such actions that you have to perform when using Excel are time-consuming. However, you can get rid of that routine by leveraging PromoNavi’s Keyword Lists tool. And on that note, we’re going to cover how to save time managing multiple keyword lists using this tool.
Why Use PromoNavi’s Keyword Lists Tool?
The answer to this question largely comes down to saving time and convenience. With PromoNavi’s Keyword Lists tool, you can:
- Give up using scattered XLS sheets—Create from scratch as many keyword lists as you need and manage them within the PromoNavi platform.
- Get to know what keywords will perform better—Set one or several targeted countries for each keyword list and get stats for the chosen locations (Average Monthly Searches, Keyword Difficulty, and Top of Page Rate). Get the updated stats when you change the targeted locations for the specific keyword list.
- Easily expand keyword lists—Use PromoNavi’s Keyword Planner and Competitor Analysis tools to find keywords and add them to your lists. All the keyword duplicates will be removed automatically.
- Save time creating campaigns—Build a Google Ads campaign based on keyword lists directly from the PromoNavi interface or download keyword lists in CSV.
How to Create Your First Keyword List
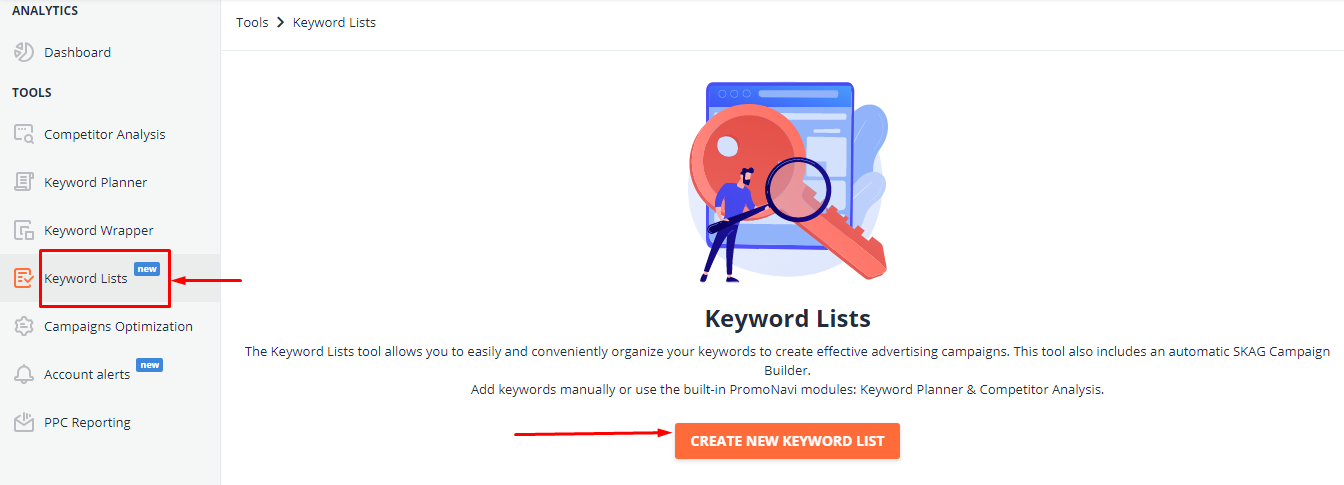
Sign up into PromoNavi, go to the Keyword Lists section, and create your first keyword list.
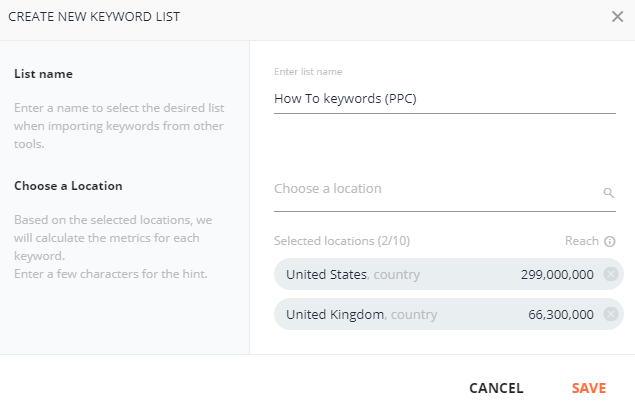
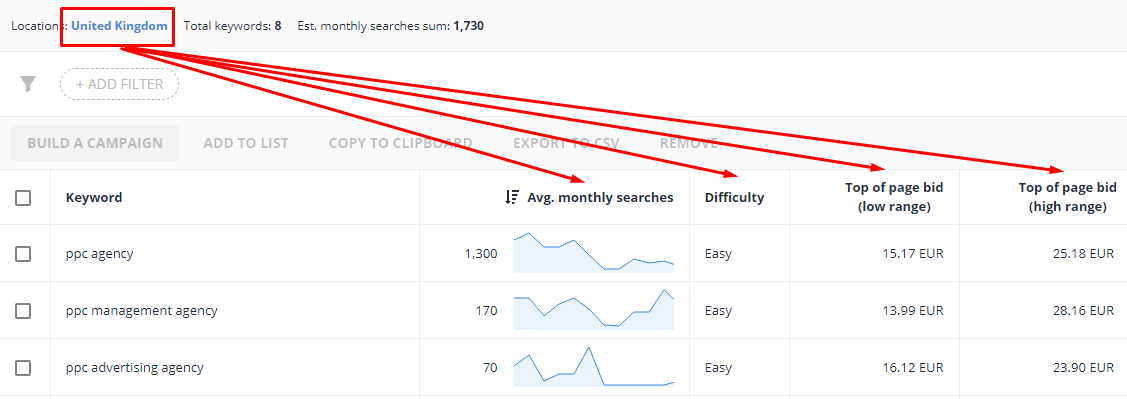
You should name your list and choose one or several targeted locations. After creating the list, you’ll be able to change locations any time you want. When you change locations, the stats for each keyword will be updated automatically—this means you don’t need to check stats manually for each new location or when you remove the existing one.
Try to name your keyword lists clearly for you and everyone who will access your PromoNavi account. Avoid names such as “List 1” or “Keywords”—try to be more specific. The good names are “Branded keywords campaign N” or “How To keywords (PPC).”
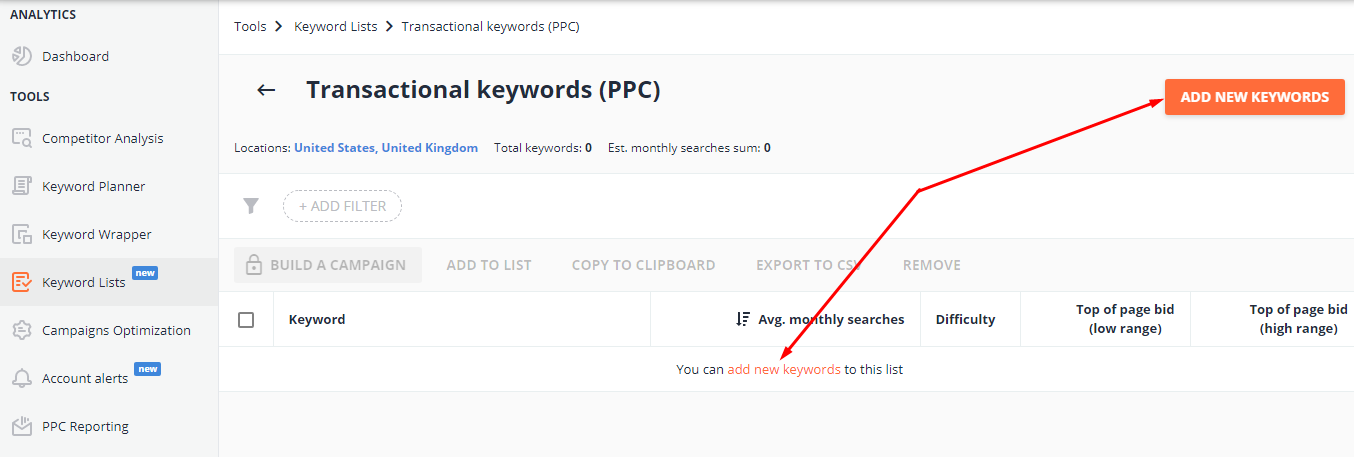
Now, you can add keywords to the list you’ve just created.
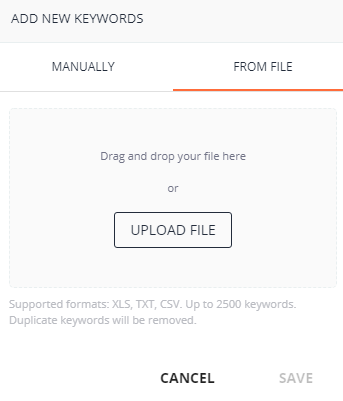
There are two ways to add keywords:
- Paste them into the appropriate field.
- Upload keywords from the file. Supported formats: XLS, TXT, CSV.
You can add up to 2,500 keywords per list. If there are keyword duplicates on your lists, the system removes them automatically, so you may be sure that your lists contain only unique keywords.
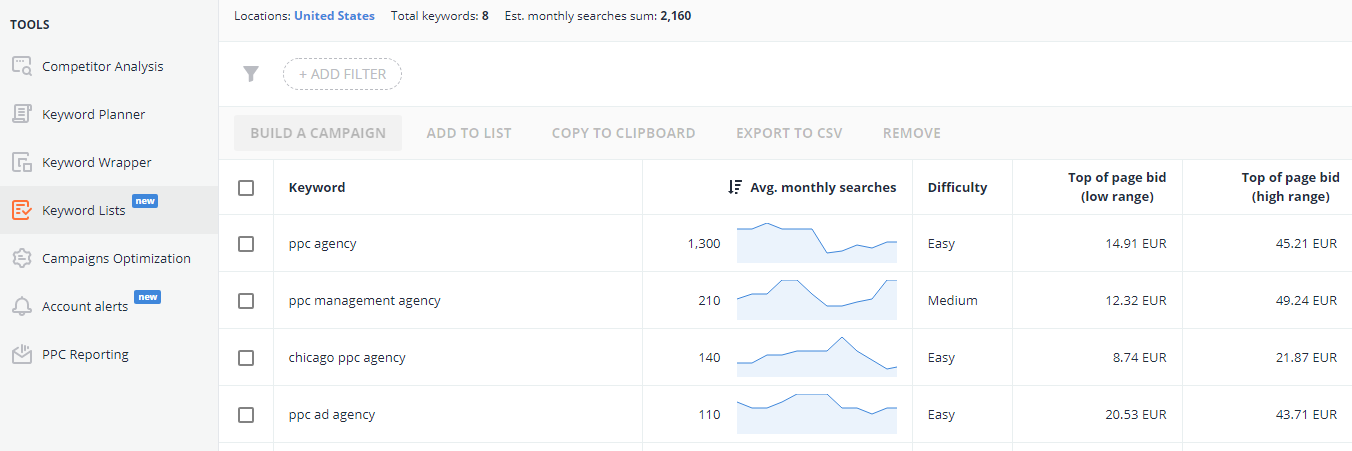
Once the keyword list is saved, the system displays metrics for each keyword from this list.
These metrics are:
- Average monthly searches. You can see the search demand for each keyword changes throughout the year. This data is significant for understanding of seasonality and uncovering rising/depressing trends.
- Difficulty. This metric shows the competitiveness of the auction for specific keywords. There are three values of this metric: Easy, Medium, and High. For example, if the Difficulty is “Easy”, you can expect high positions in paid searches for this keyword. With high-difficulty keywords, it is harder to obtain the higher positions, so you might have to increase bid adjustments, significantly improve your Quality Score, or follow the Google Ads recommendations to increase your Optimization Score, etc.
- Top of page bid. This is an estimated bid range that allows you to show your ads on the top of the search results page. Actual CPC will probably differ from estimated values. However, Top of page bid values are referenced for refining your bidding and budgeting strategy.
If you change target location for keyword list, the metric values will change as well. It’s convenient when you want to use an existing keyword list for another location—you just copy it, update the location, and explore performance metrics.
From the Keyword Lists main screen, you can see the key data and manage your lists:
- Download in CSV
- Edit name and locations
- Delete
How to Create and Expand Your Keyword Lists Using PromoNavi’s Keyword Research Tools
The Keyword Lists feature is integrated with PromoNavi’s keyword research tools so you can easily expand your existing lists with new keywords or create lists from scratch. Let’s see how it works.
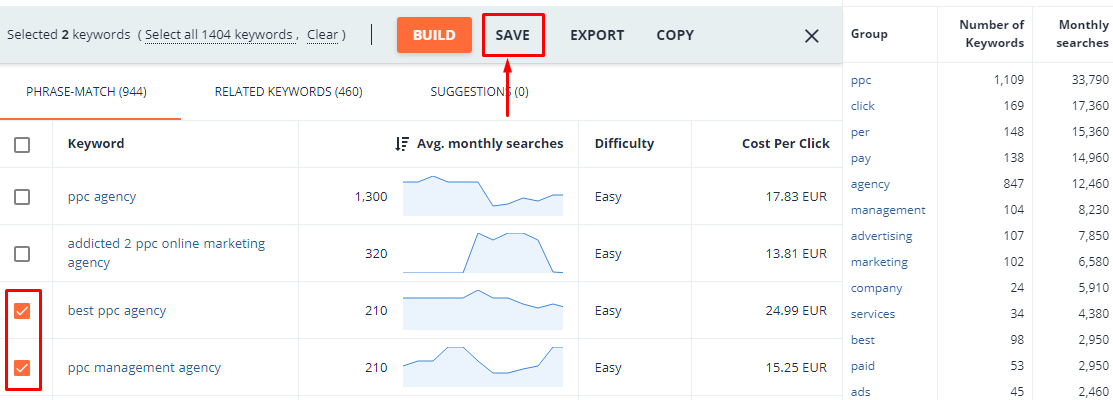
Let’s say you’re searching for keywords using the Keyword Planner tool. Tick keywords you want to add to your lists and press Save.
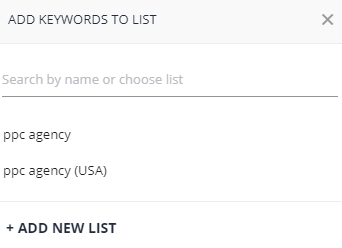
In the pop-up window, choose the list where you want to add selected keywords or create a new one.
The same feature is available when you are searching for competitors’ keywords using the Competitor Analysis tool.
Recommend you to read:
How to Build a Google Ads Campaign Using Keyword Lists
You can add keywords from your keyword lists to existing campaigns or create a new one directly from PromoNavi. The system will group keywords and find cross-group negative keywords for each ad group. Let’s see how it works.
(To use this feature, make sure your Google Ads account is linked to PromoNavi.)
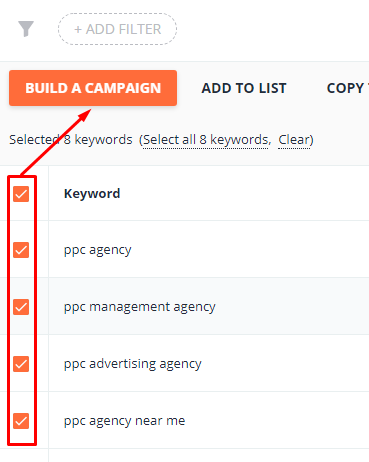
Select keywords you want to add to your account (use filters or tick them), and click BUILD A CAMPAIGN.
Choose your Google Ads account (you can search it by Name or CID) and an existing campaign from the list, or create a new one. For a new campaign, enter a campaign name and set a budget.
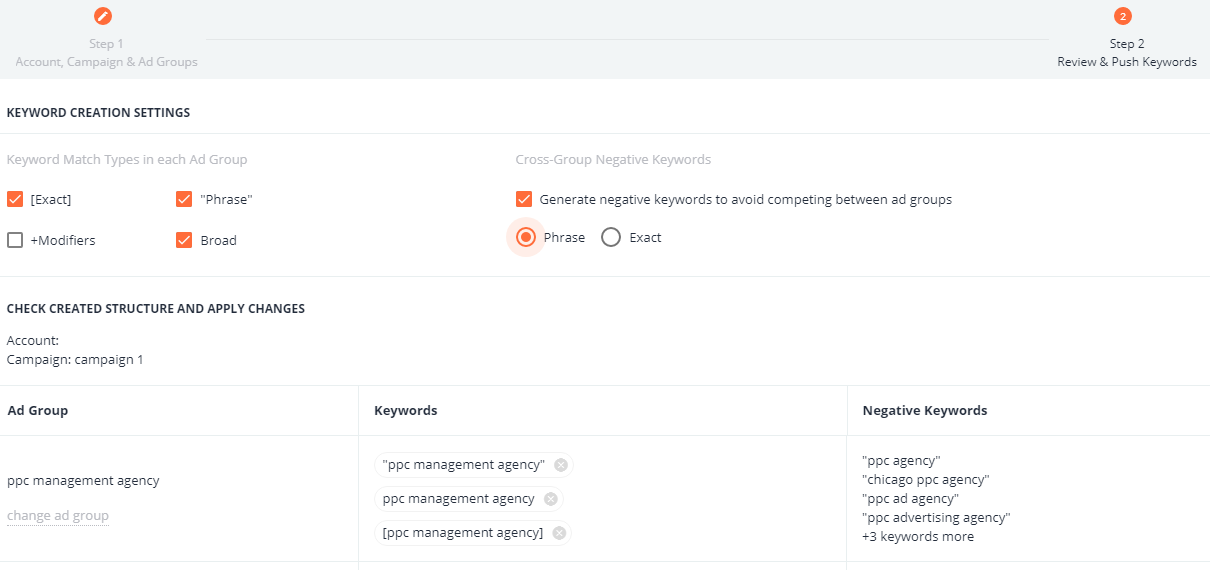
The platform will generate SKAGs (Single Keyword Ad Groups) for each chosen keyword.
In the Keyword Creation settings, you can select match types for each keyword in new ad groups, and enable or disable cross-group negative keywords list generation.
Check the generated campaign structure, and apply changes if needed. Also, you can export the ad groups and upload them to your campaign through Google Ads Editor.
9 Win & Loss Strategies for PPC Keyword Grouping [+Examples]
Life Hacks to Leveraging Keyword Lists Tool
- Name your keyword lists the same way that your campaigns or ad groups are named. This will help you navigate through the huge amount of lists.
- If you target different locations, just copy an existing keyword list and change location. The system will update the stats according to the new locations.
- Use filters to find best-performing keywords on your list. You can filter out keywords by Average Monthly Searches, Keyword Difficulty, and other criteria.
- Find out trendy keywords. Hover the cursor over the Monthly Searches chart, and you will see the detailed stats for the last 12 months.
